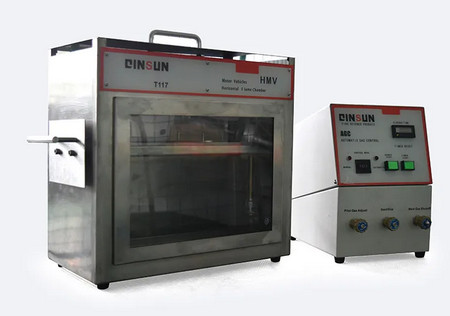
Brief introduction of the vertical horizontal combustion tester test method

The vertical horizontal burning tester is mainly used to determine the burning performance of plastic, rubber or film under the specified fire source to judge its fire resistance level. The product is mainly applicable to the research, production and quality inspection units of lighting equipment, engineering plastics, rubber products, electrical connections, low-voltage electrical appliances, household appliances, motors, tools, instruments, etc. and component parts, and also applicable to insulation materials, engineering plastics, fire sealing materials or Other solid combustible materials, etc.
Horizontal combustion test method
At one end of the specimen 25mm and 100mm, mark two lines perpendicular to the long axis, at the other end of the 25mm mark, make the specimen parallel to the longitudinal axis, tilt 45 degrees with the horizontal axis position clamped specimen, Bunsen burner and specimen relative position adjusted, rotate the pressure gauge, the pressure gauge is only used as a switch application, generally do not show the reading, so that the flow meter shows suitable gas flow, and then fine-tune the flow meter, start the ignition button , ignite the Bunsen burner.

Adjust the gas flow and adjust the knurled nut on the lower end of the Bunsen burner to produce a 20mm high blue flame when the lamp is in a vertical position, tilt the Bunsen burner at 45 degrees. Push the Bunsen burner into position by remote control or by pushing the Bunsen burner push bar. If the specimen continues to burn (both flaming and flameless), use the panel button keys to record the burn time T (in seconds) from the 25mm burn front to the end of the burn and record the burn length L (in mm) from the 25mm mark to the end of the burn.
Note: If the burning front crosses the 100mm marker, the burning time T is recorded from the 25mm marker to the 100mm marker, and the length of burnout is 75mm at this time.
Vertical burning test method:
Fix the specimen vertically so that the bottom end of the specimen is at a height of 10mm from the top end and use the standard equipped ruler to mark the position of the Bunsen burner and the specimen to ensure a distance of 10mm. Pull back the Bunsen burner, start the Bunsen burner and adjust it to produce a 20mm ±:2mm high blue flame, push the Bunsen burner push rod, move the Bunsen burner to the lower end of the specimen and apply the flame to the specimen, when the flame application time is over (10s), pull back the Bunsen burner, at this point manually turn on and press the timer to record the afterburning flame time and record the second afterburning flame time (t2) After the afterburning flame is over, press the timer again timer to record the second afterflame time (t3). Note: In the course of the specimen, if there is a drip igniting the phenomenon of skim cotton, then manually end the experiment of this specimen, in the application of flame time, if the phenomenon of flame spread to the fixture, then manually end the experiment of this specimen.
2023-02-22 14:29

