How to setting up the QUV accelerated weathering tester?

QUV UV aging test chamber is the aging test equipment widely used in the world. It has become the world standard for laboratory accelerated weathering test. It can simulate the key short-wave ultraviolet rays and truly reproduce the damage and aging of materials caused by sunlight.
How to setting up the QUV accelerated weathering tester?
Uncrating
Cut the metal straps which hold the fiberboard carton to the skid. Lift off the fiberboard carton. Cut the metal straps connecting the unit to the skid. Lift the unit off the skid and move into place.

Remove all adhesive tape from inside and outside the unit.
Locate the QUV away from strong drafts, which might adversely affect temperature uniformity.
For best temperature stability it is helpful, but not essential, to locate the QUV in an air-conditioned room.
Caster Installation
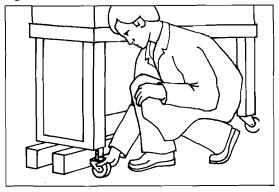
To install casters, prop up one end of the QUV on a box and push the casters into the sockets in the legs.

Water Connections
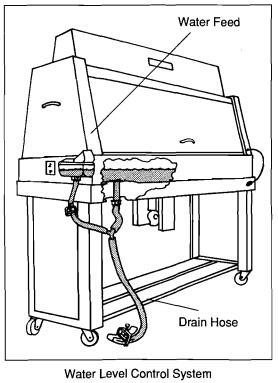
Each QUV uses only about 8 liters of tap water per day. The automatic water feed is connected to the tap line by a standard 114 inch (6 mm) flexible tube.
We recommend connecting the 114 inch (6 mm) tubes to the water line above the hung ceiling and running the tube to the QUV through a small hole in the ceiling tiles.
Ventilation
The 1984 revision of ASTM G-53 calls for a room temperature kept below 86OF. We recommend keeping the room temperature between 60' and 80°F.
Each QUV generates an average of 700 watts of heat on a continuous basis. That's equivalent to 2400
BTU/hr. Each QUV also evaporates about 8 liters of water per day. These loads should be taken into account when designing air conditioning and ventilation.
2023-02-08 14:40


